How to Create and Manage Your Leads Form on V1CE
1. Introduction
Capturing and managing leads has never been easier with V1CE's Leeds forum feature. Whether you are collecting contact details or following up with potential customers. This guide will show you how to set up your leads form. Customize it and ensure everything works smoothly.
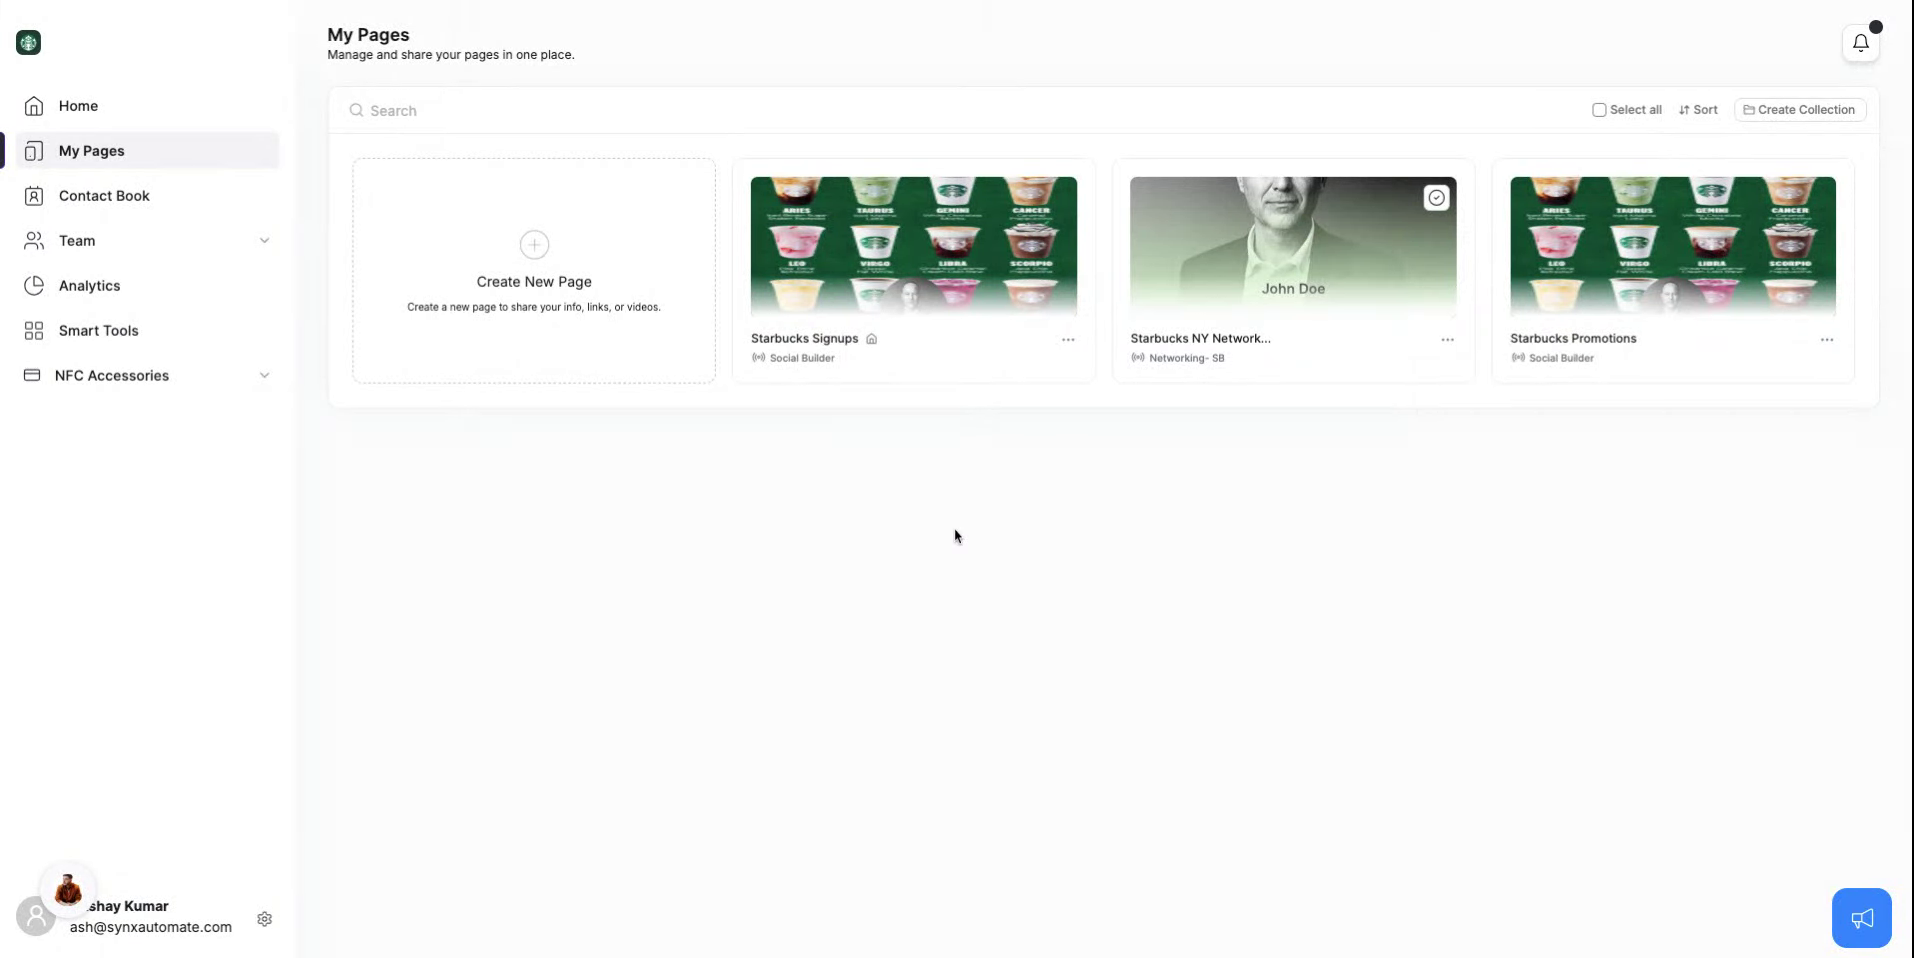
2. Create New Content
Click on Create New Content
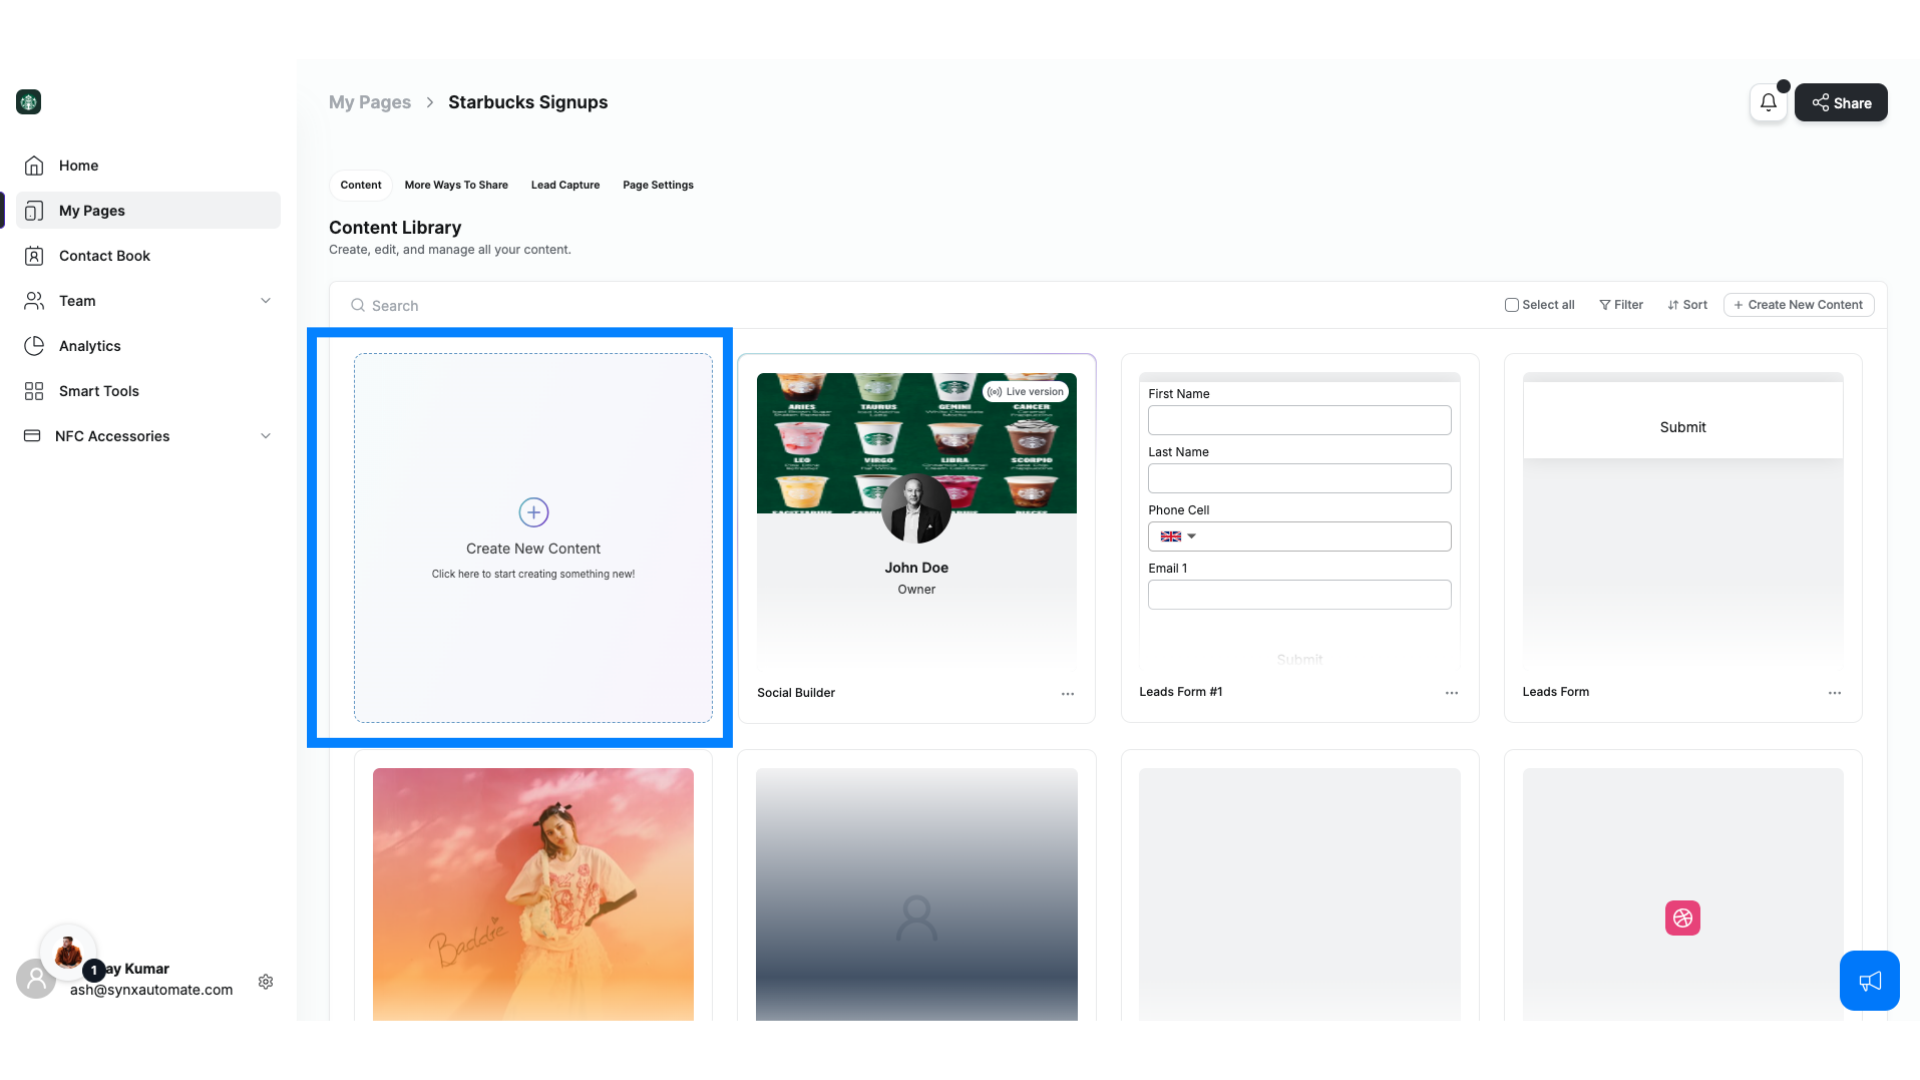
3. Select Leads Form
Select Leads Form
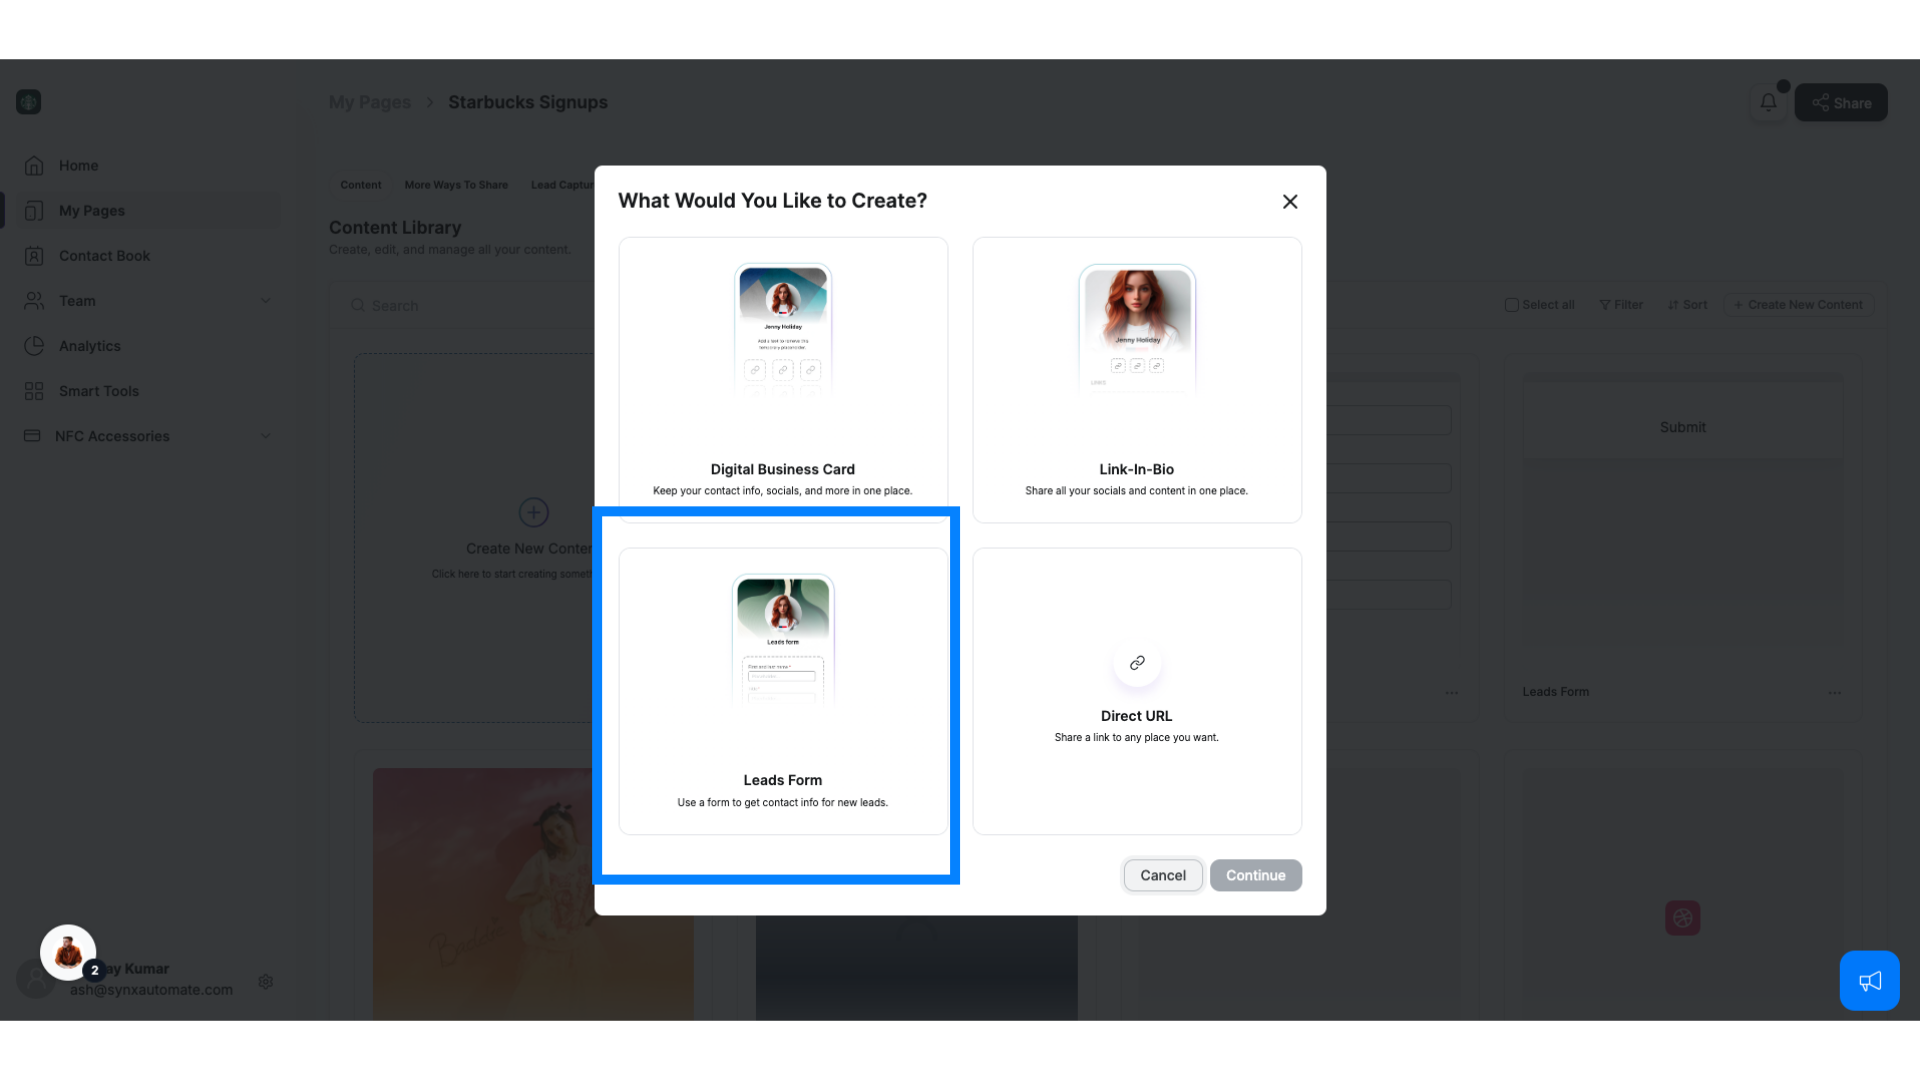
4. Customize Your Leads Form
Once you're in the Leads Form editor, you’ll see plenty of customization options:
Add a Cover Photo: Personalize your leads form with a cover image that aligns with your branding.
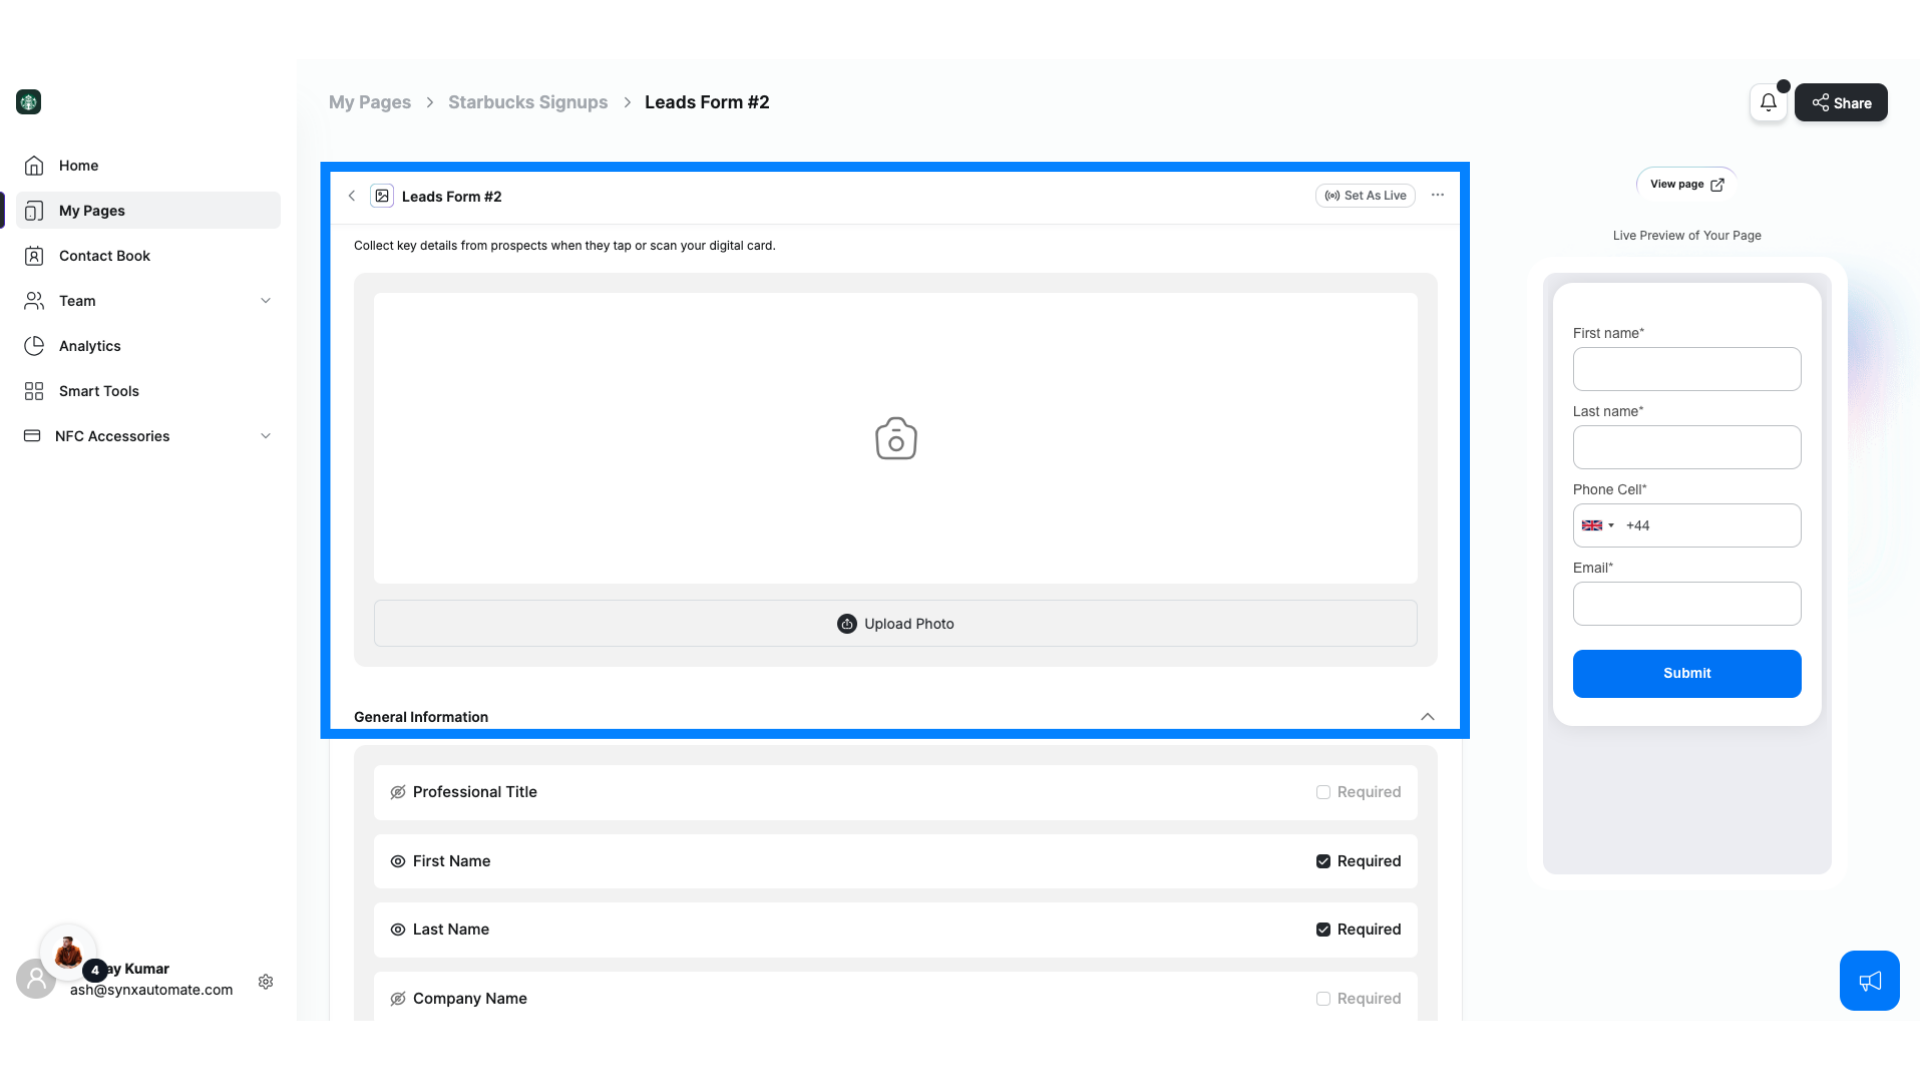
5. Fields Customization
You can make certain fields visible or invisible by clicking the eye icon next to each field.
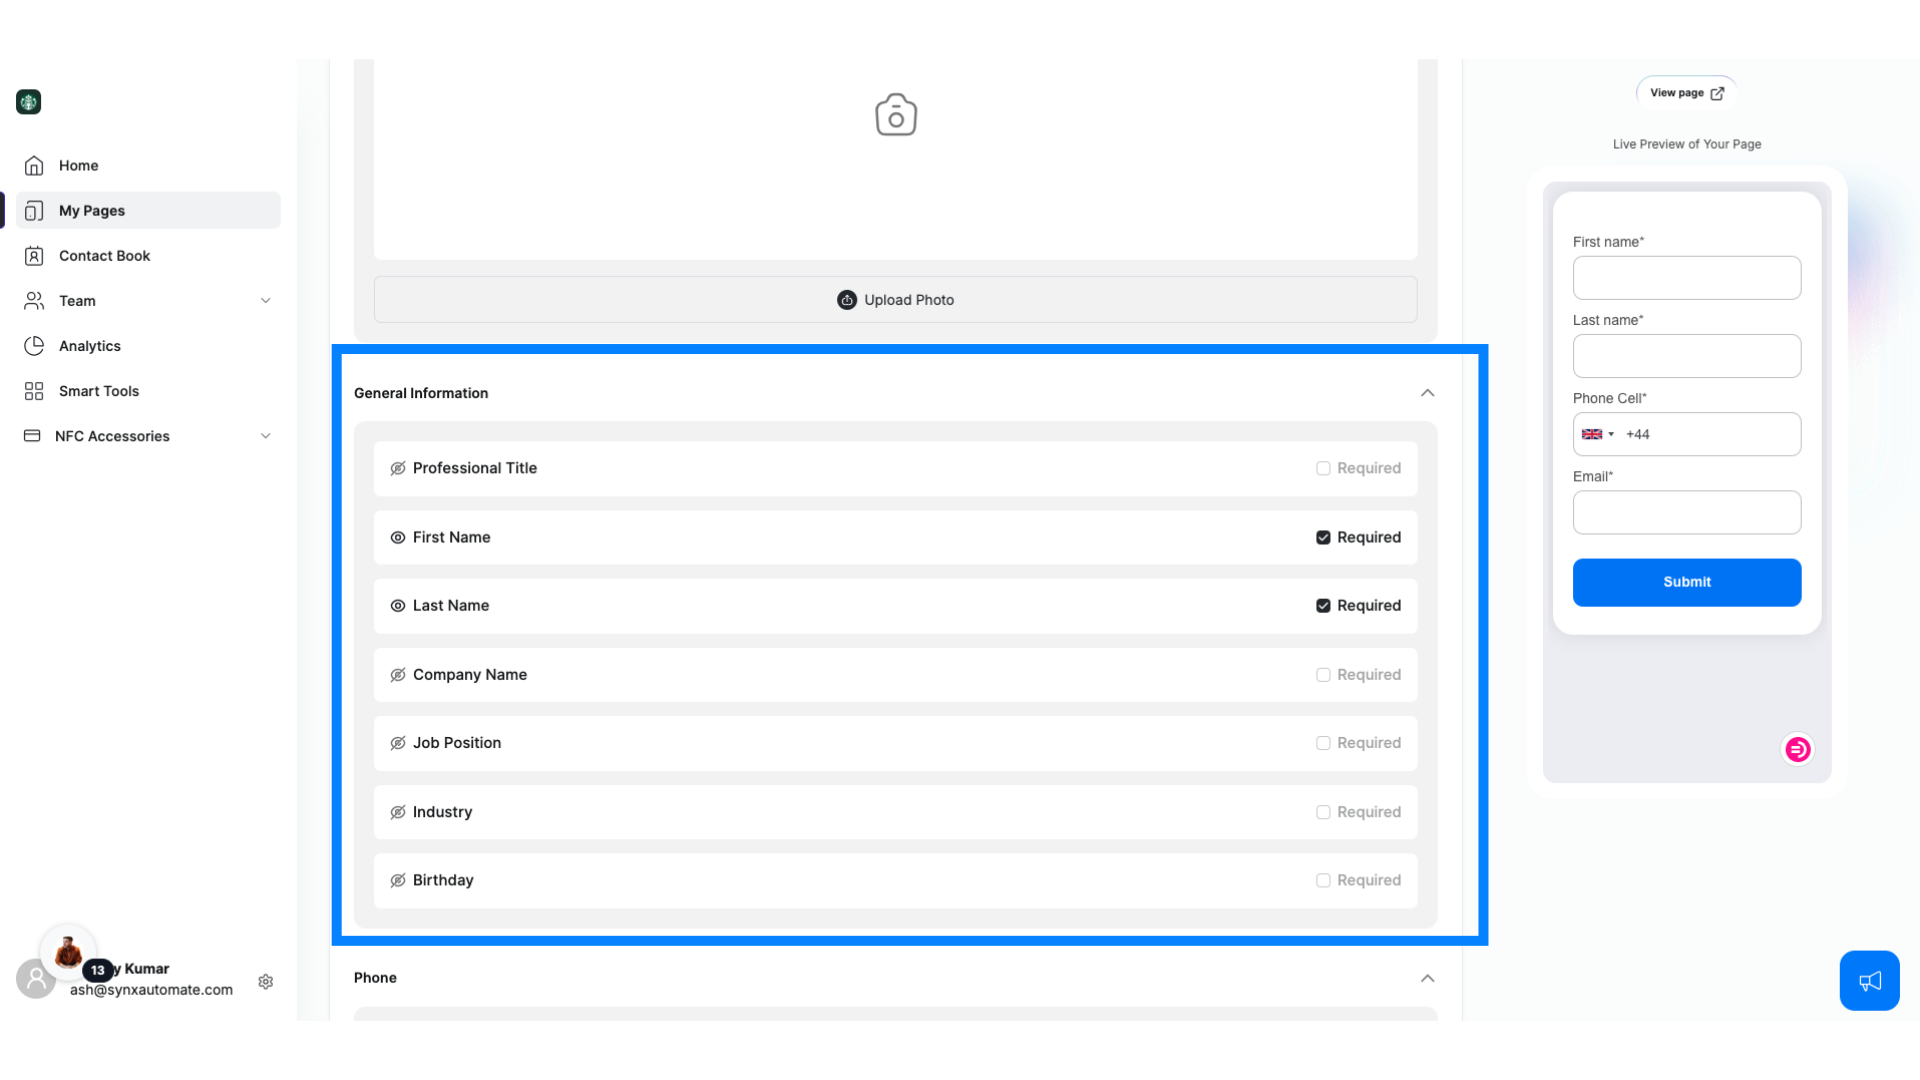
6. Set Fields as Required or Optional
Choose which fields are required by marking them as “required” or leaving them optional.
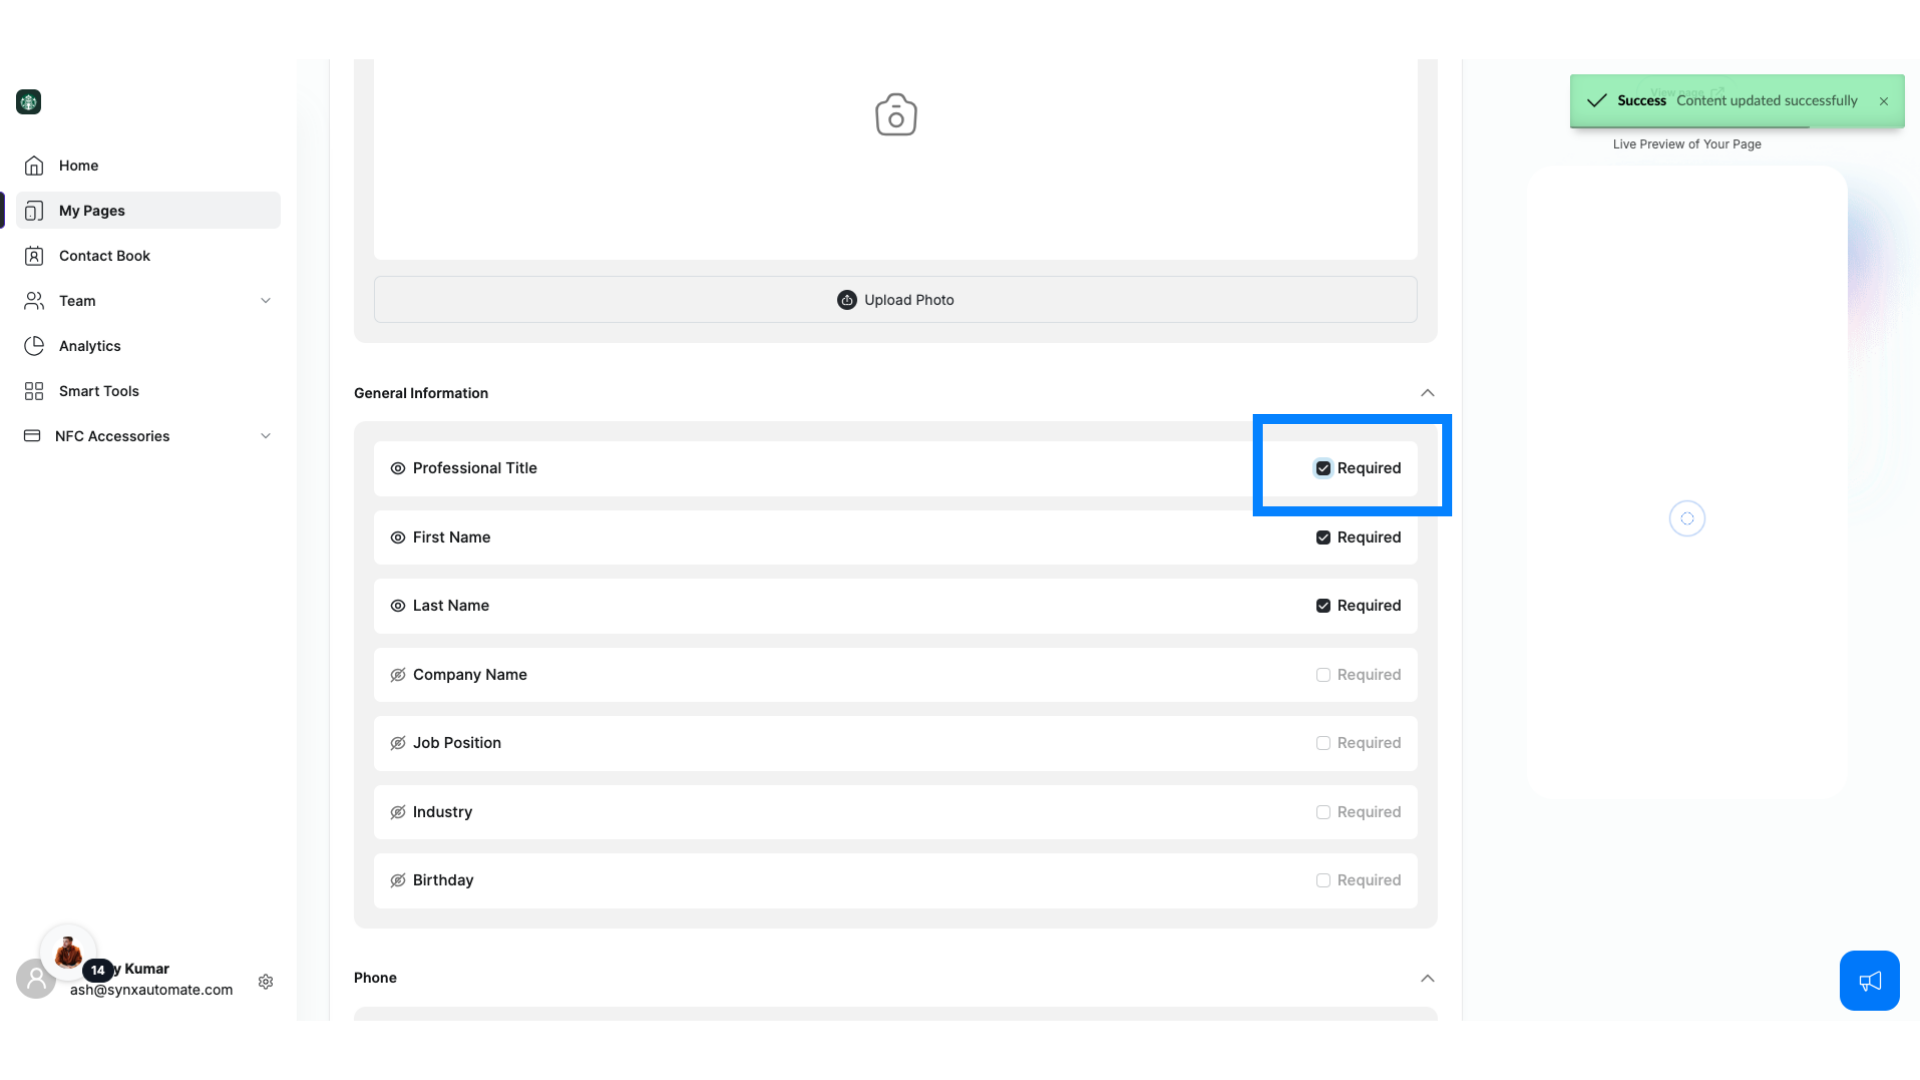
7. Preview the Form
On the right side of the screen, you can see a real-time preview of your form as you make changes.
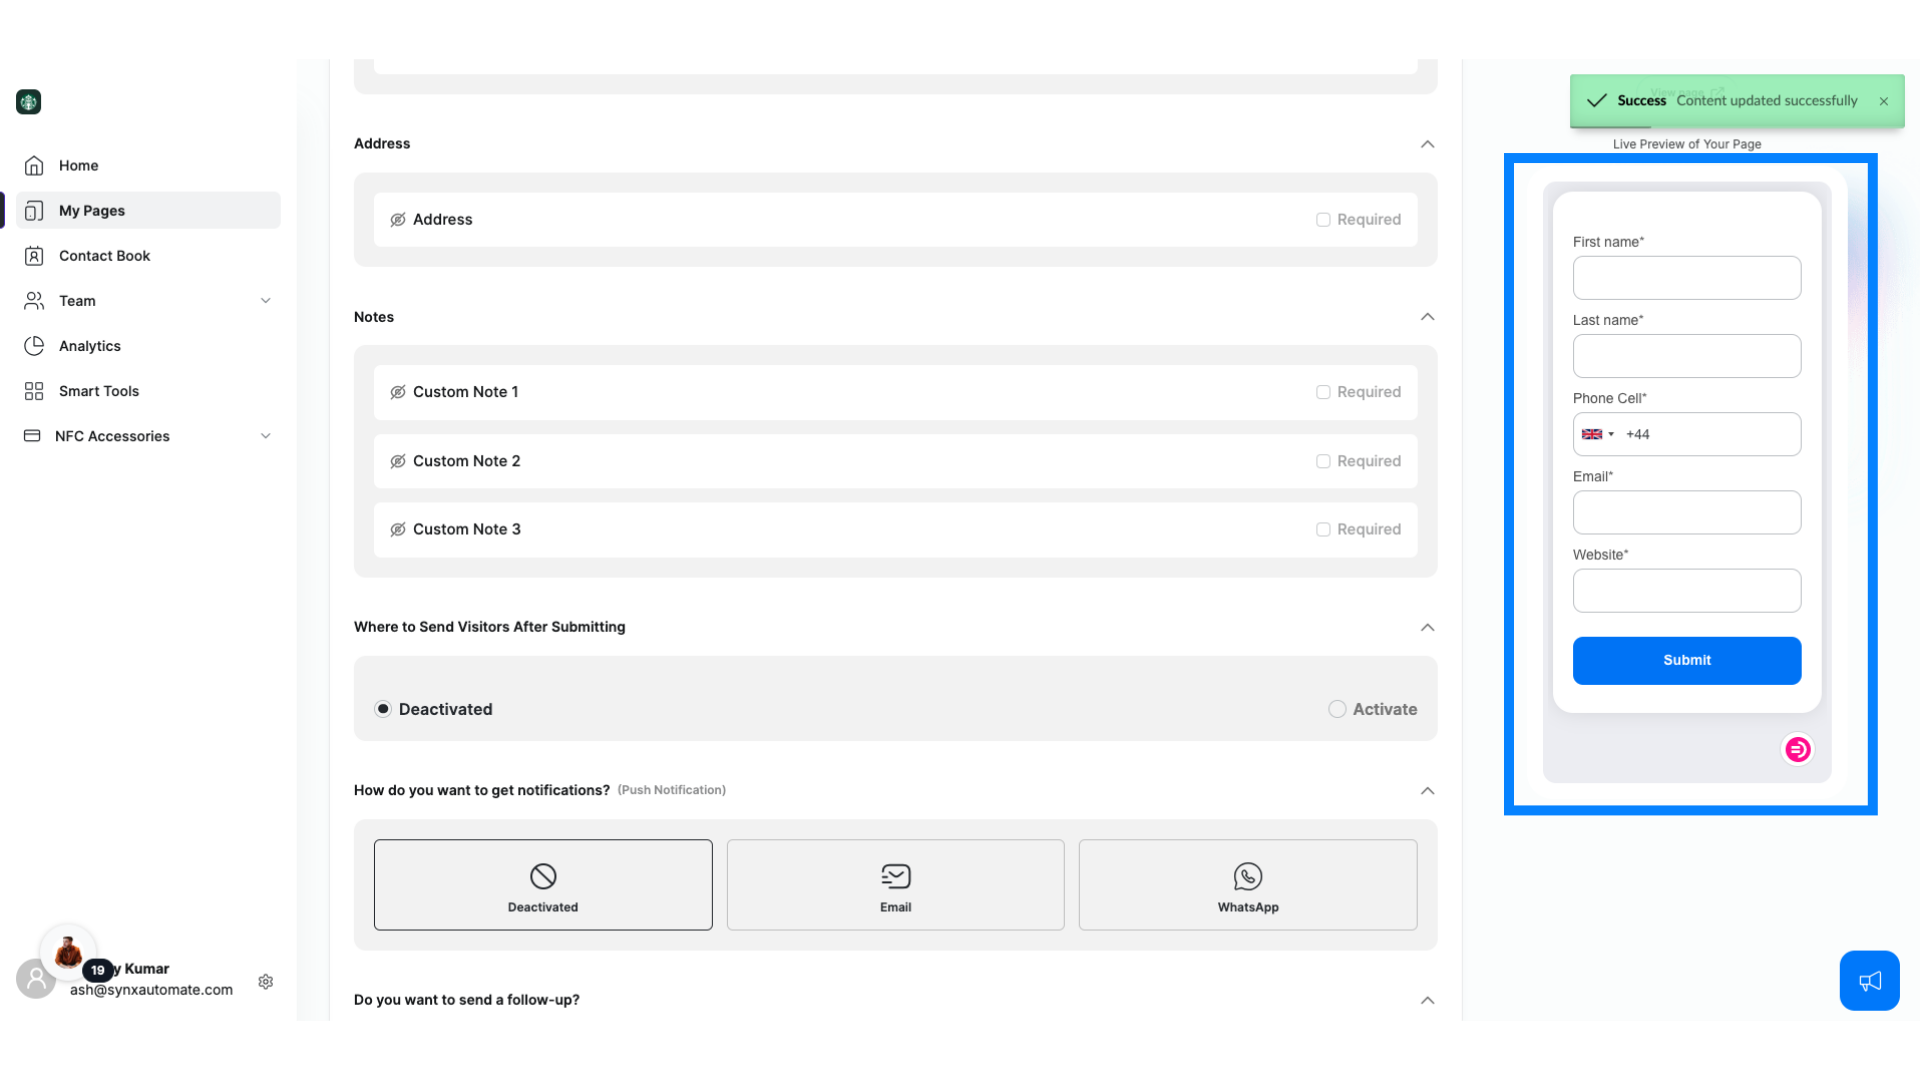
8. Add Custom Notes
You can also add custom notes to guide your visitors or provide additional instructions. This is great for adding context or explaining what information you're asking for.
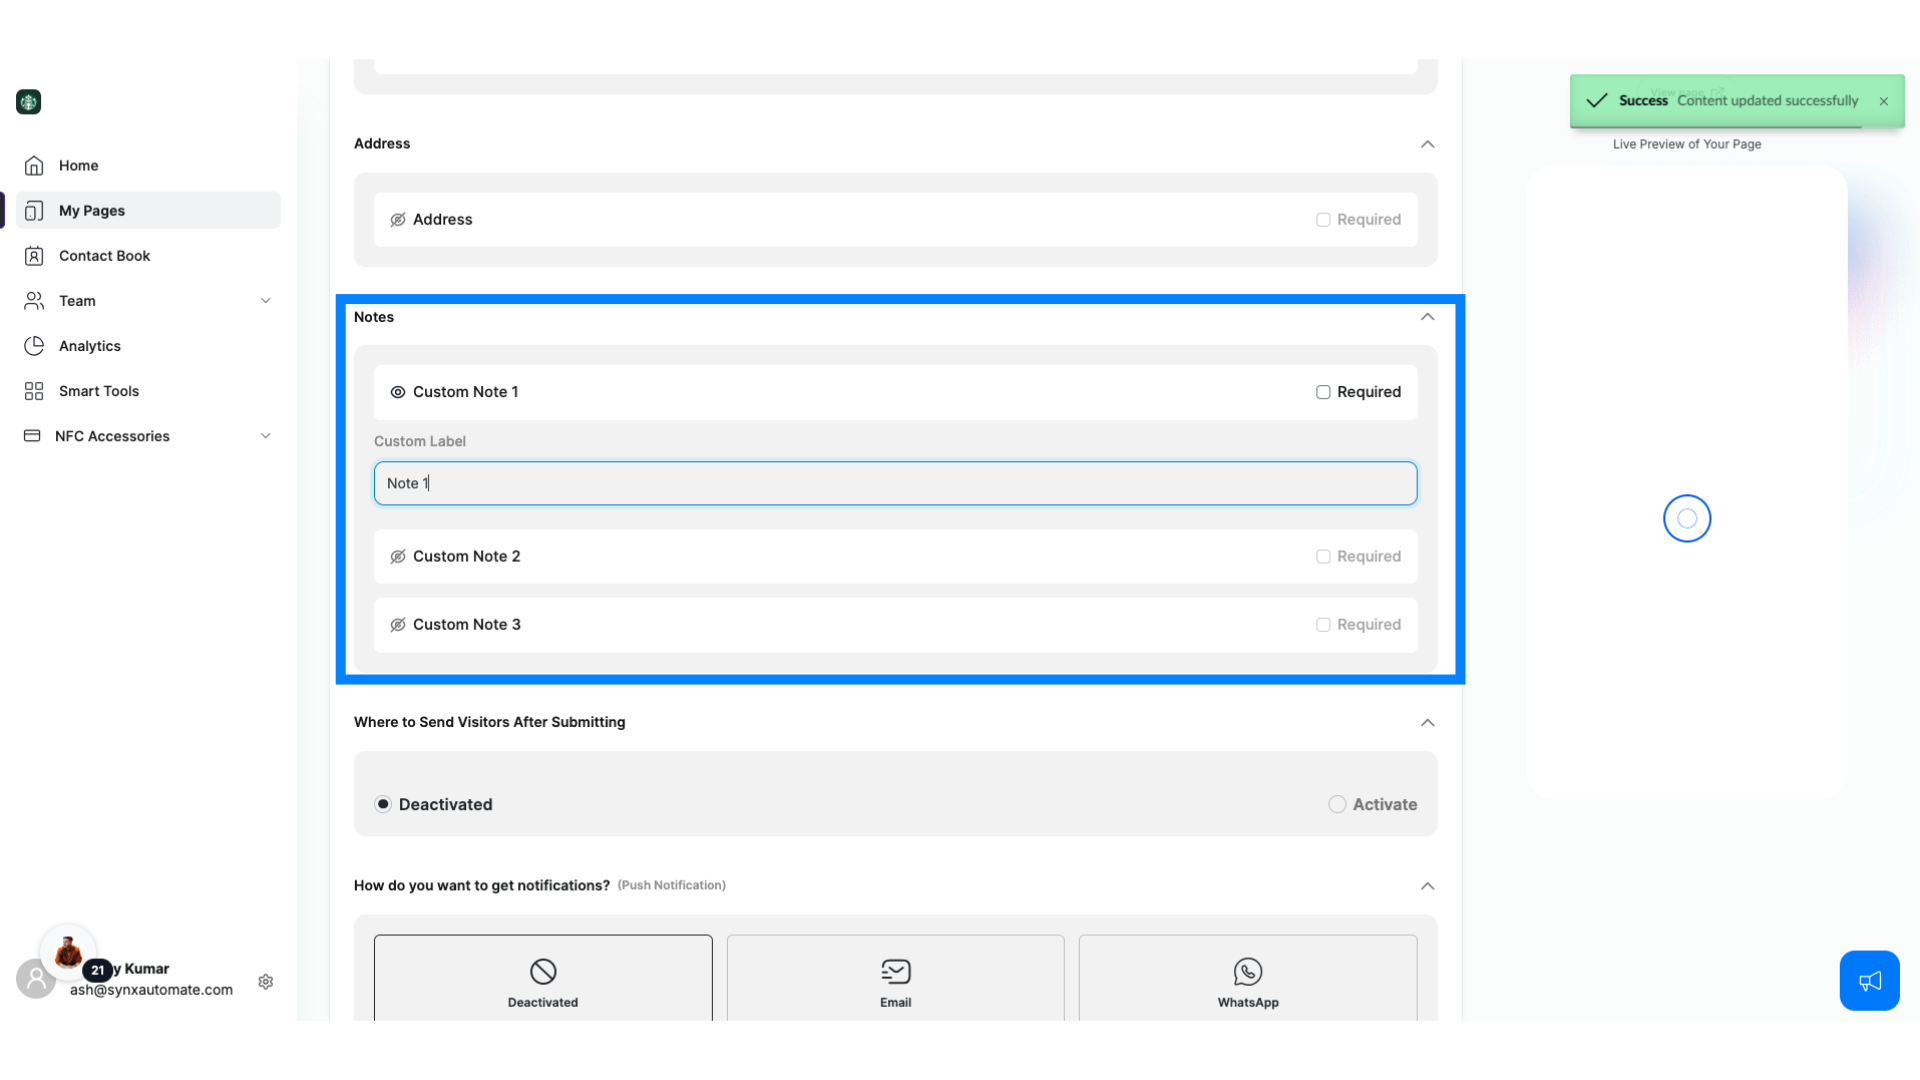
9. Redirect Visitors After Submission
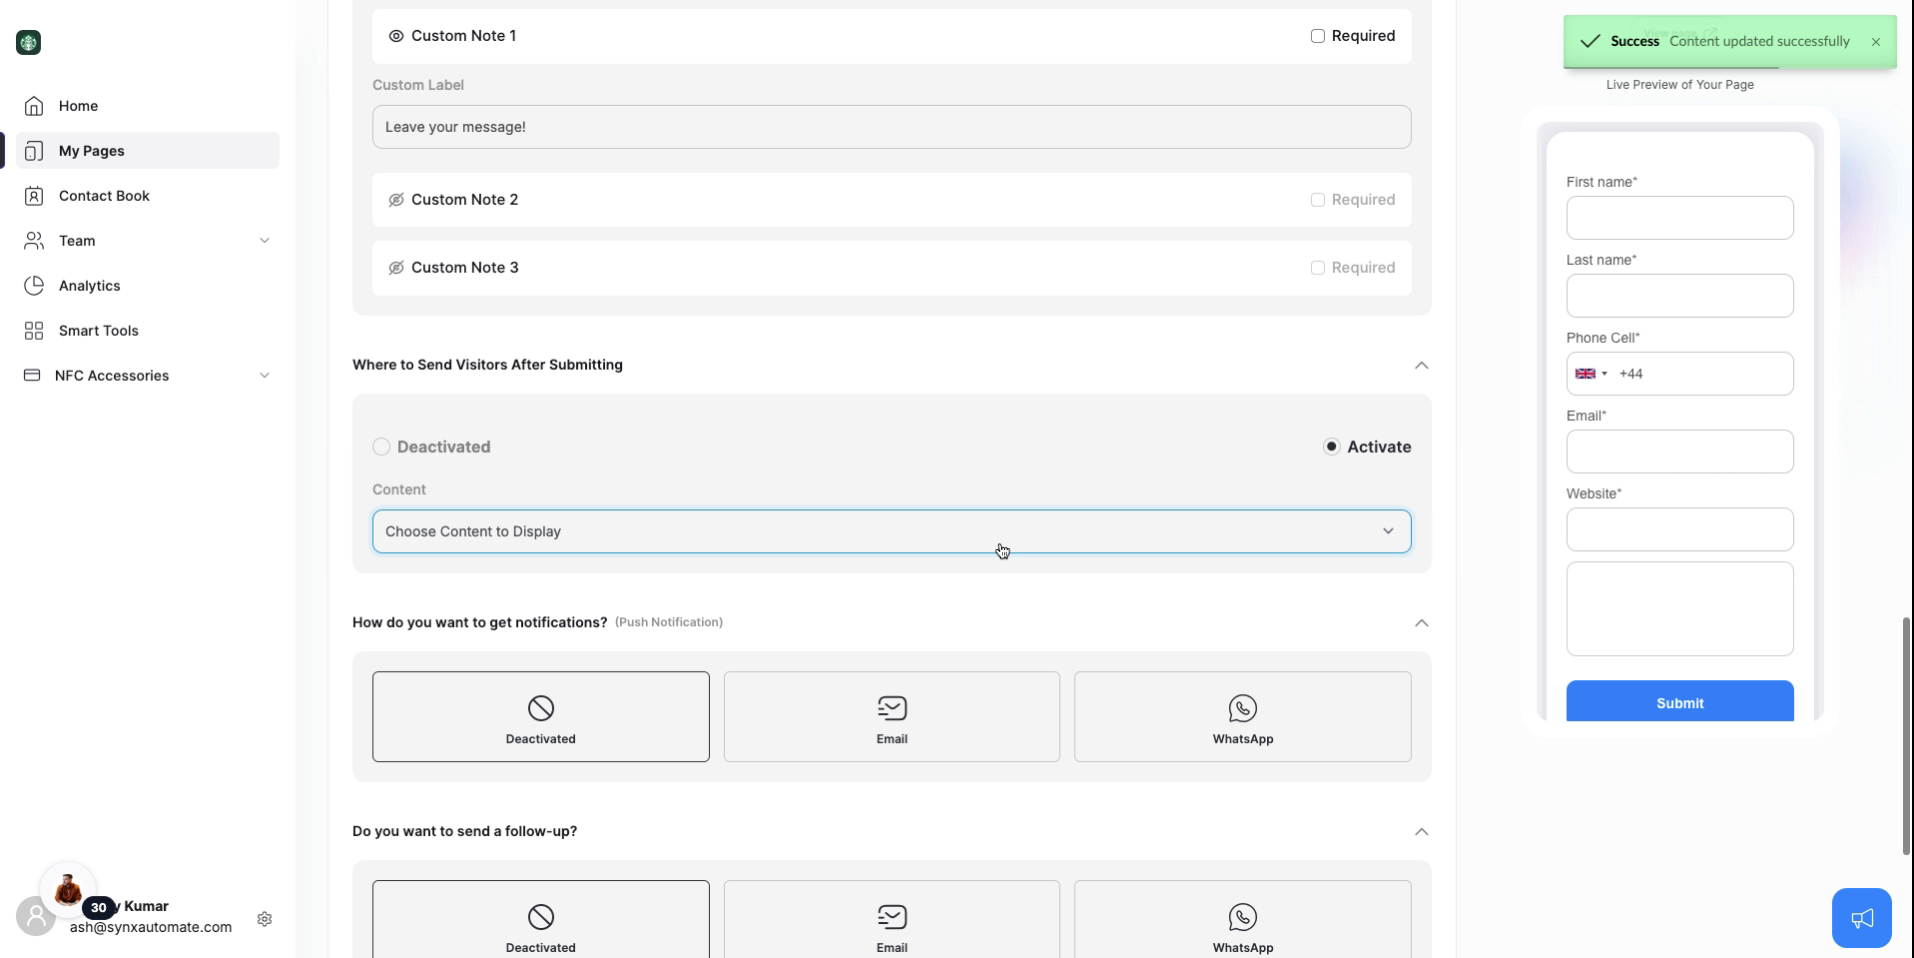
Once someone fills in your Leads Form, you can redirect them to any content of your choice. This could be a Social Builder page or any other content you choose. To set this up:
Click on Activate
Select the relevant content (for example, Social Builder)
10. Notifications
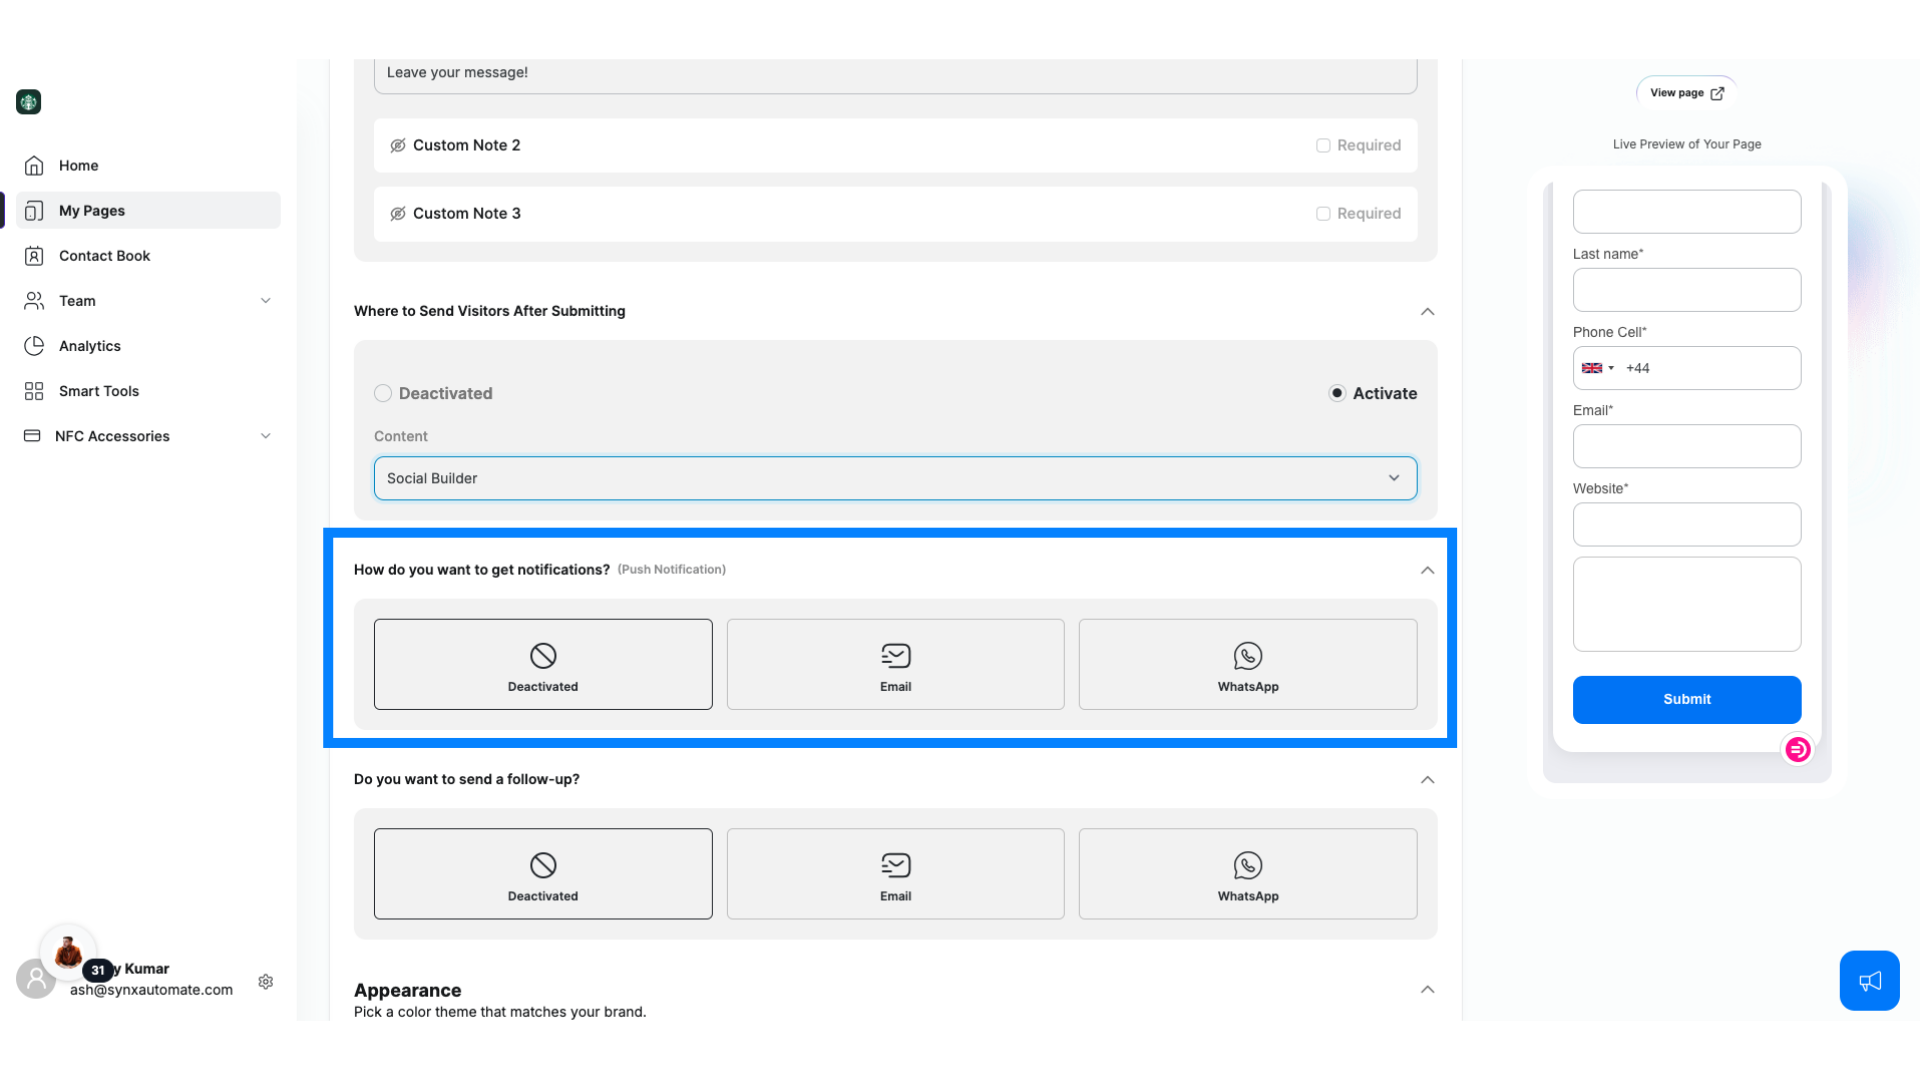
You can set up notifications to alert you when someone submits their information.
Default Notification: By default, you’ll receive notifications in the V1CE app.
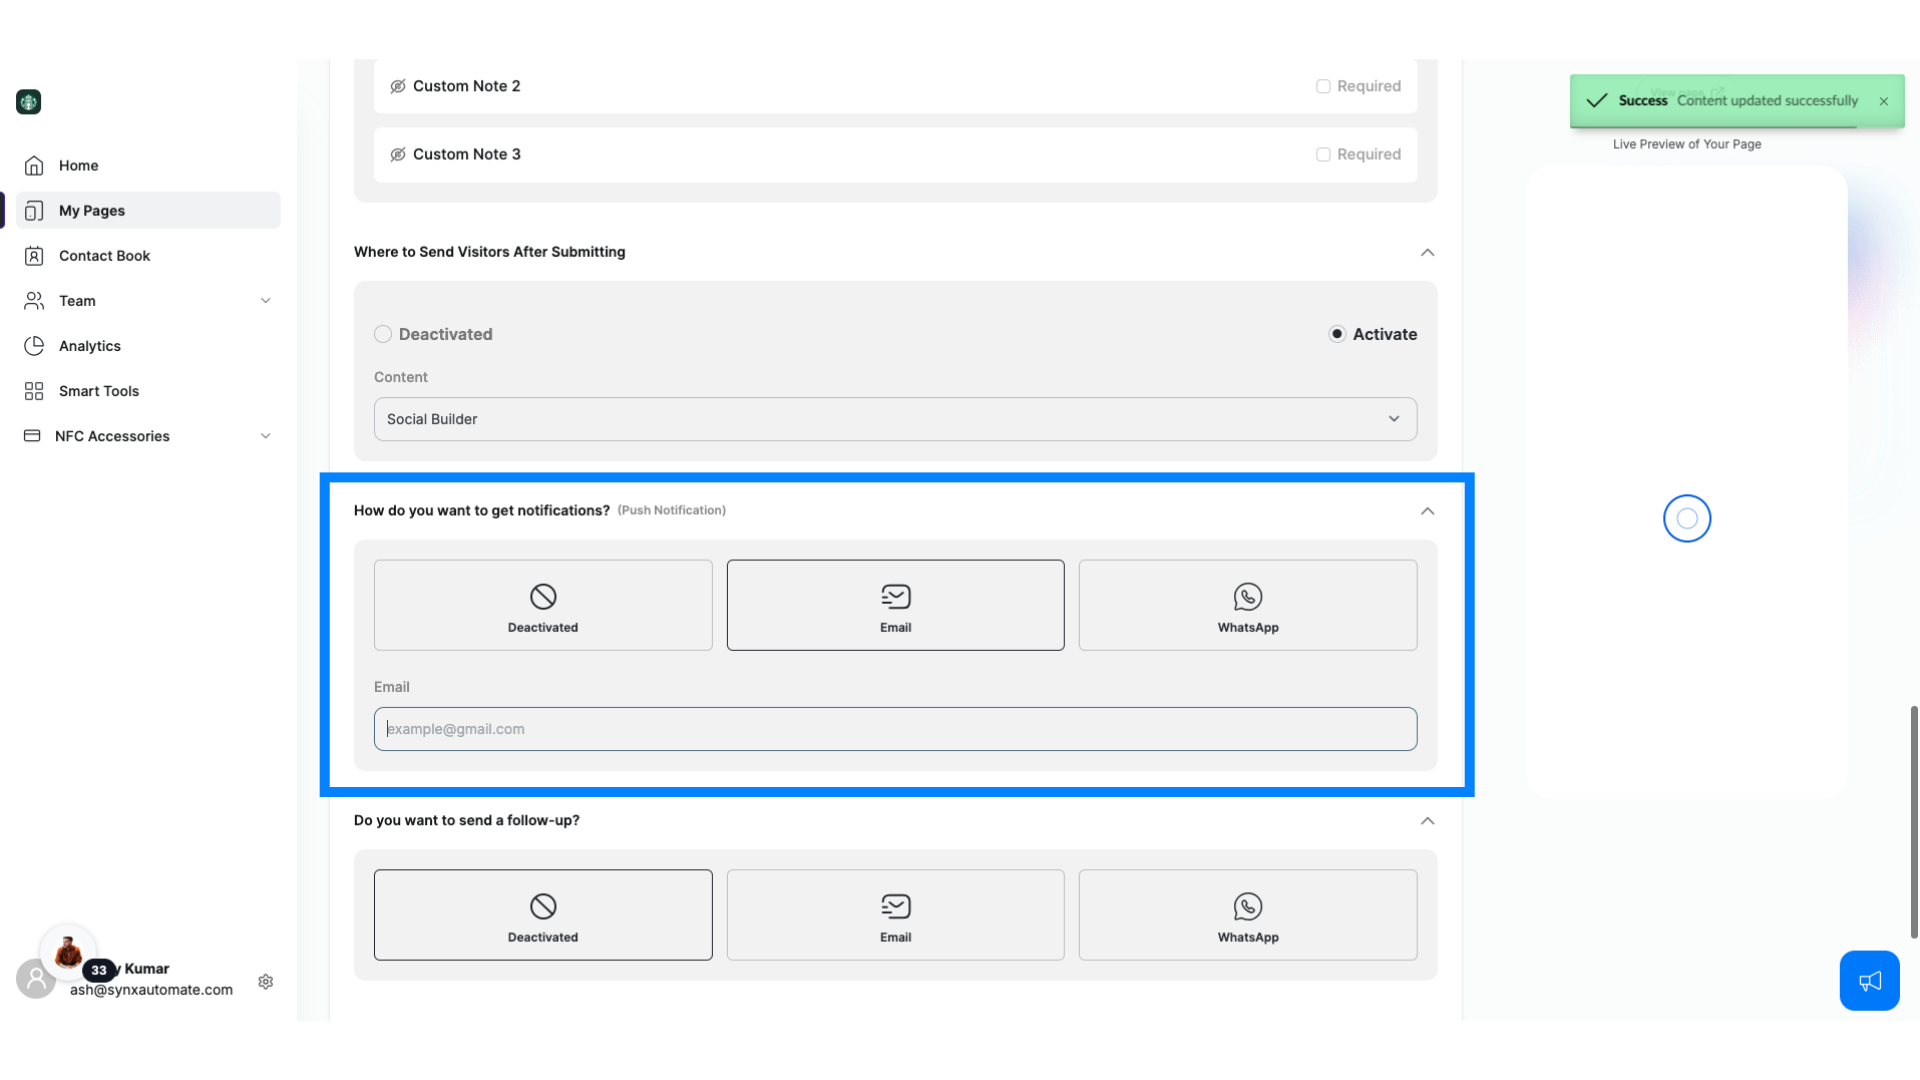
11. Notifications- Email or Whatsapp
If you prefer, you can opt to be notified via email or WhatsApp. Just select the notification method and enter the relevant email or WhatsApp number.
12. Auto Follow-Up
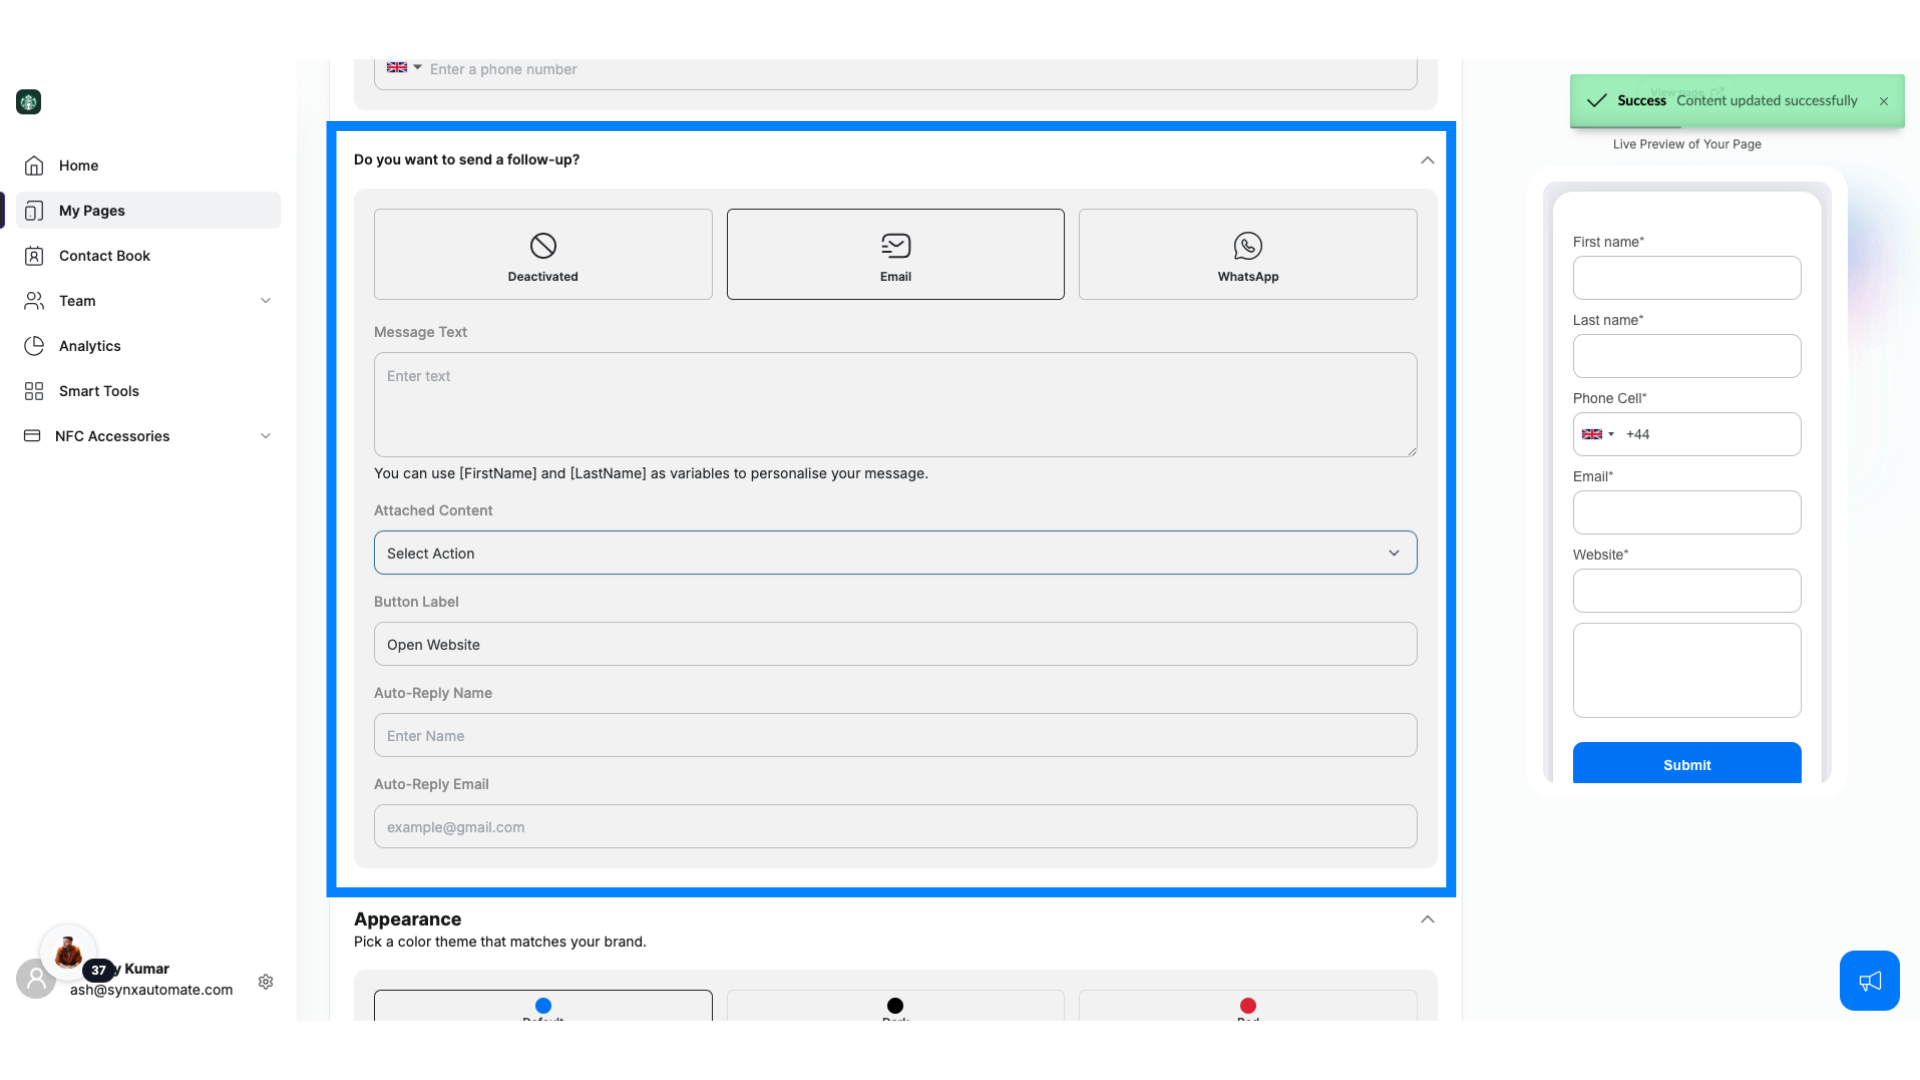
You can set up auto follow-up messages when someone leaves their contact.
For email follow-ups, you can customize the message and include other content (like a Social Builder page) along with it.
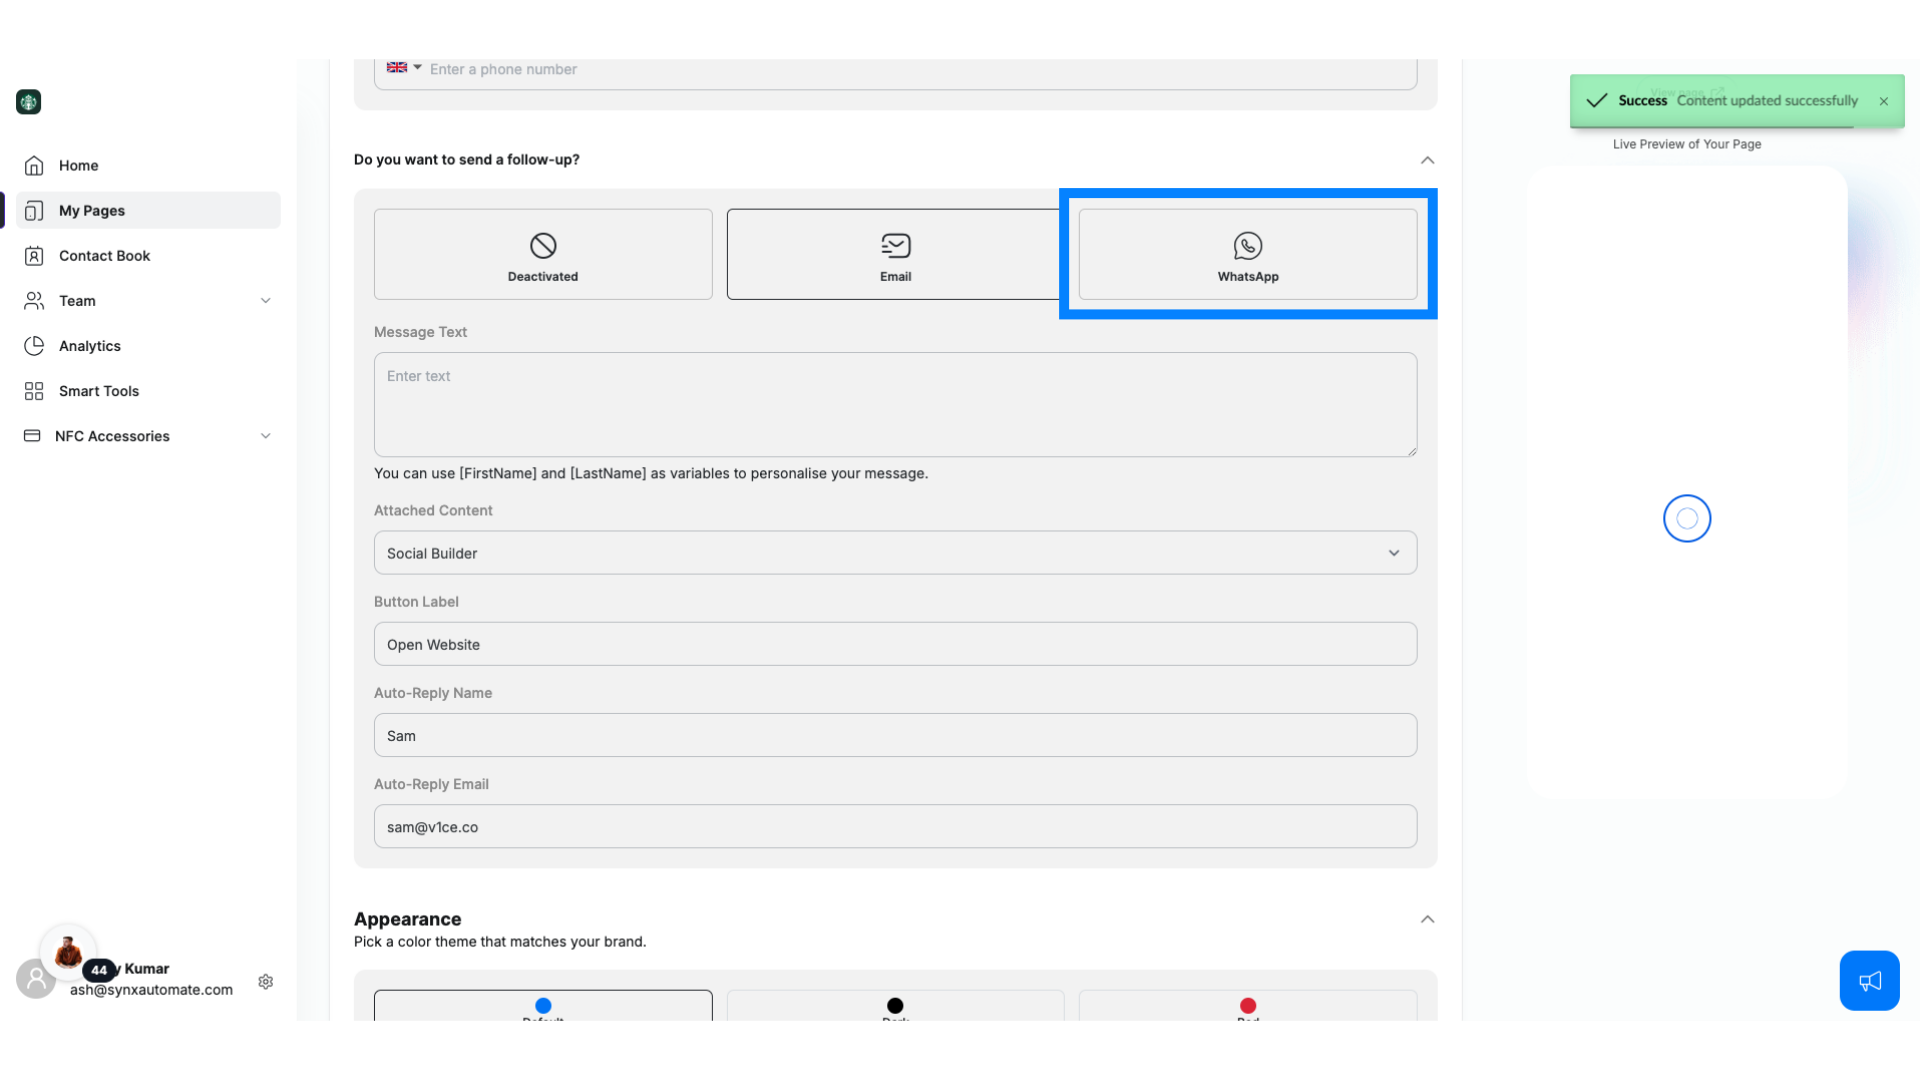
13. Auto followup- WhatsApp
For WhatsApp follow-ups, you can send a pre-written message to keep the conversation going.
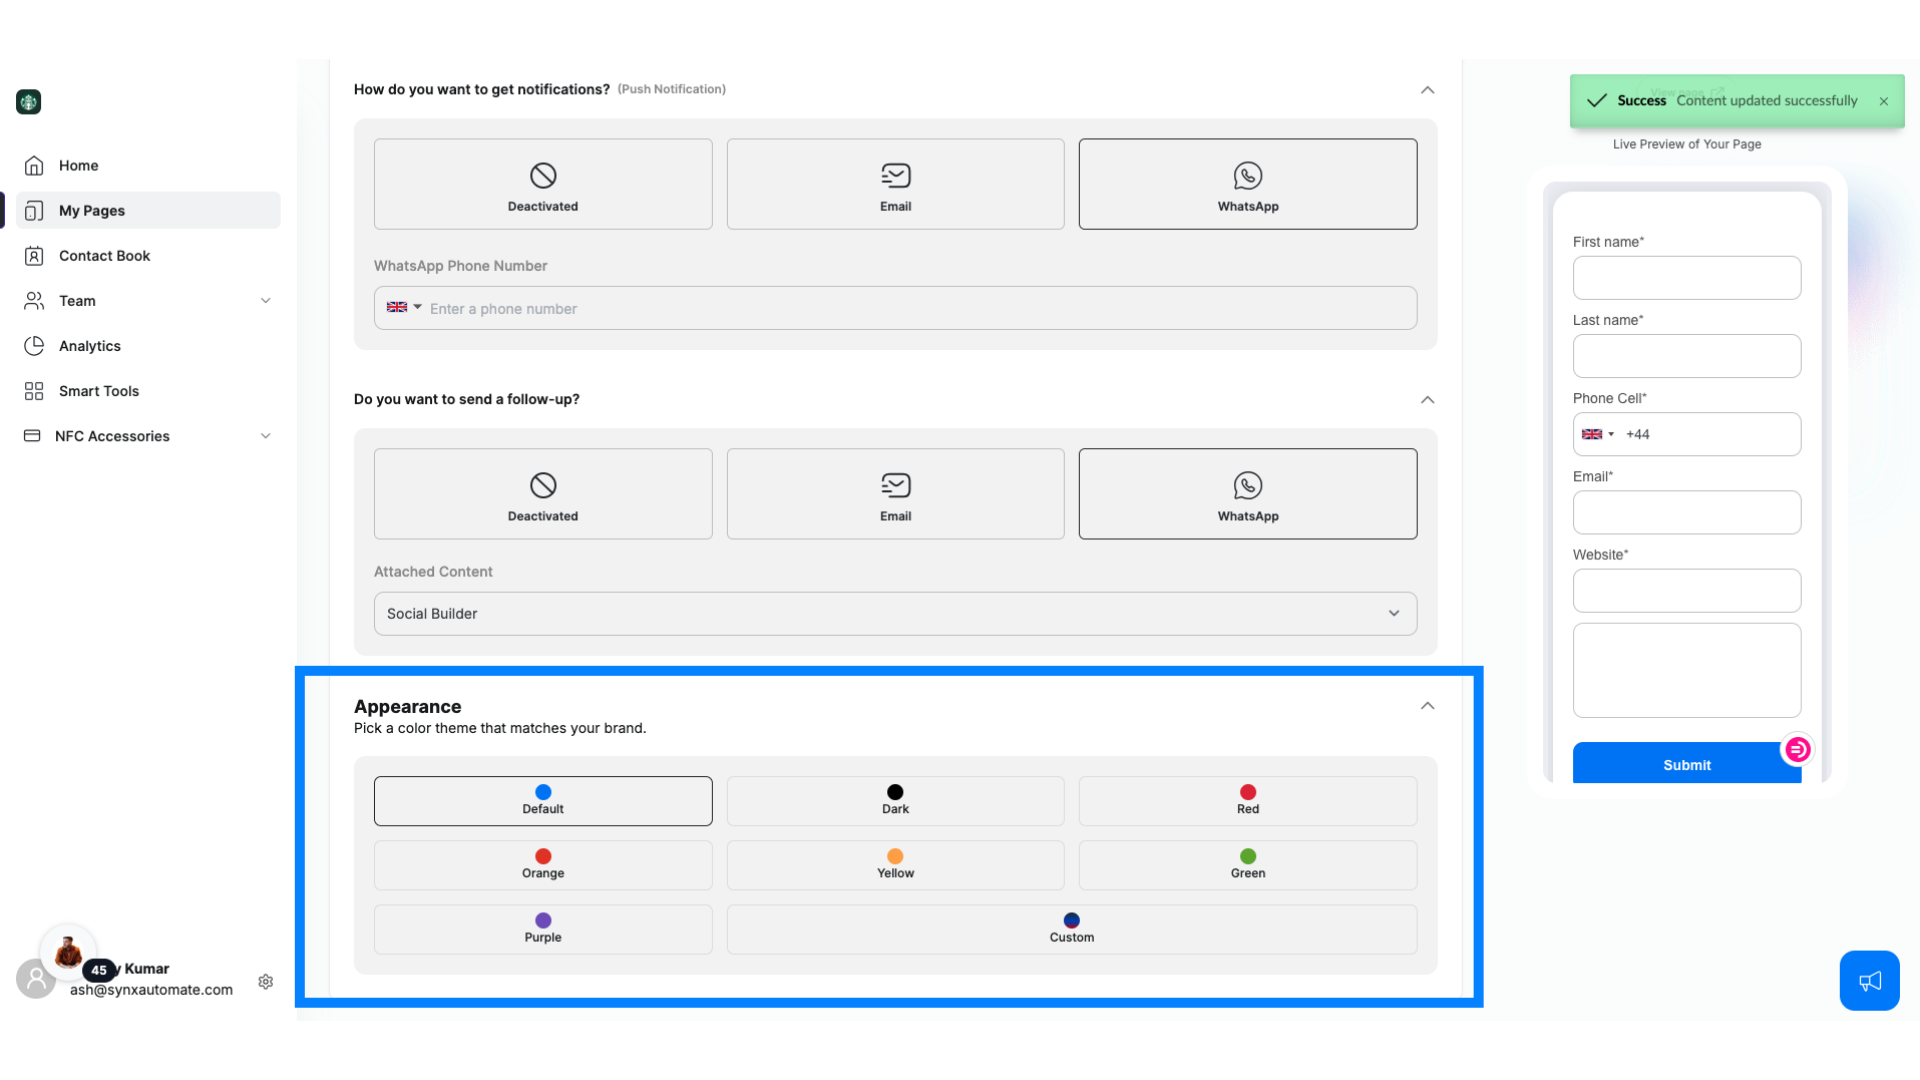
14. Match Your Branding
Make sure your form matches your brand by customizing the theme. This helps create a cohesive experience for your visitors.
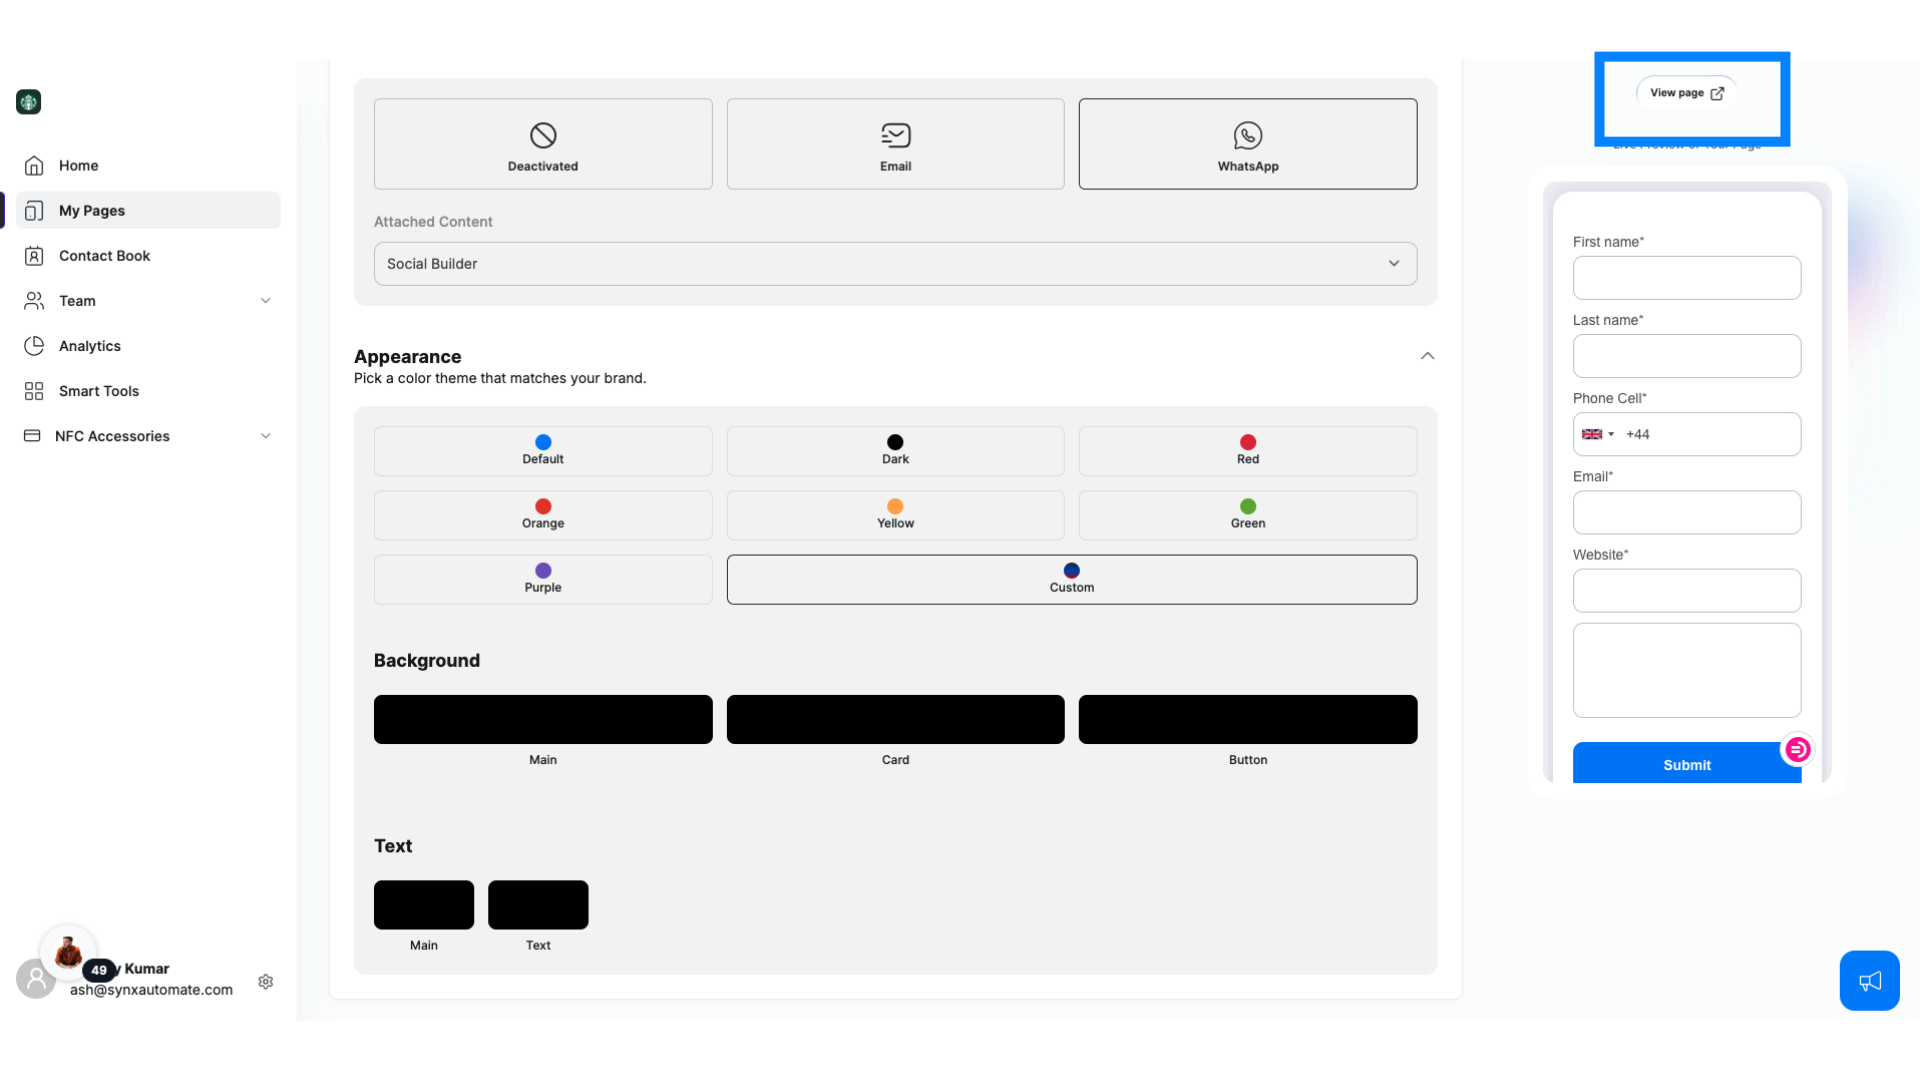
15. Preview
Once you’ve customized everything, take a look at the preview to ensure your Leads Form looks just the way you want.
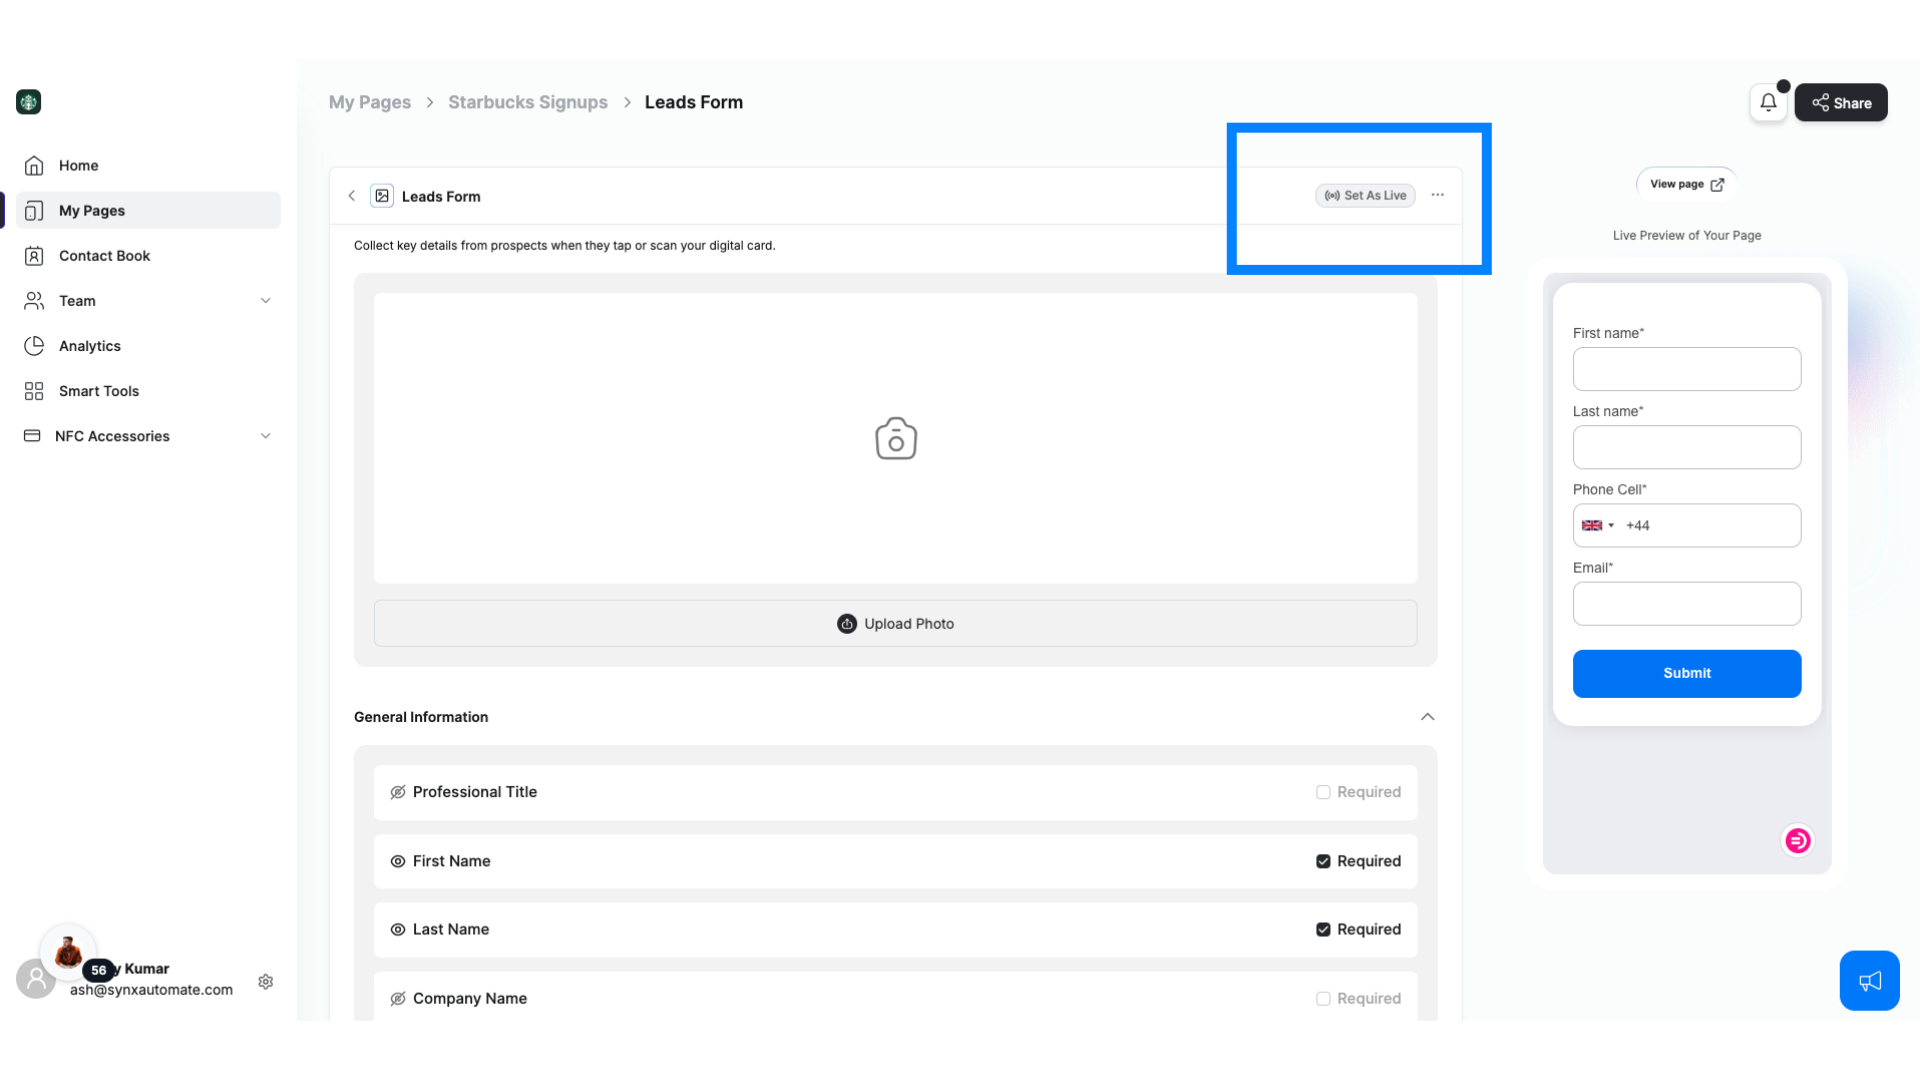
16. Click "Set As Live"
When you're ready, simply click Make Live to activate the form on any of your pages.
Related Articles
Lead Capture: Effortlessly Collect Leads from Your Prospects
1. Introduction With Lead Capture, you can automatically collect valuable lead information when prospects try to network with you. 2. How to Turn on Lead Capture Open your page, select Capture Leads, and Toggle the Button to turn on the feature. 3. ...Create and Customise Your Digital Card with V1CE: Step-by-Step Guide
What is a Digital Card? A Digital Card is your profile on V1CE. It contains all your professional and personal details in one place, making it easy to share your contact information instantly. Instead of carrying physical business cards, your Digital ...Integrations: Seamlessly Connect V1CE with Your CRM and More
1. Introduction V1CE offers powerful integrations to help you stay connected and organized. Whether you’re using HubSpot, Zoho, Salesforce, or Google Sheets, you can easily sync your V1CE account and manage leads smoothly. 2. Who Can Use ...Mastering the Networking Toolkit: Smarter Ways to Connect & Share
What is the Networking Toolkit? The Networking Toolkit in V1CE is designed to help you share your Digital Card effortlessly, whether online, in person, or during virtual meetings. With a range of Smart Tools, you can make networking more efficient, ...Managing Your V1CE Subscription: A Step-by-Step Guide
What is Subscription Management? Managing your V1CE subscription is simple and flexible. Whether you need to upgrade, downgrade, or cancel your plan, everything can be managed directly from your Subscription Management settings. With full access to ...